Browse articles or ask us a question. We'll get you on the right path.
How To Start A Floor Plan
It is not mandatory to login/create an account in order to start drawing a floor plan, but when you’ll be ready to save your drawing you’ll be required to login/signup first. Also, only after login you are able to see which features are paid (they are marked with an yellow/orange star).
There is a New Plan function that you can access from several places:
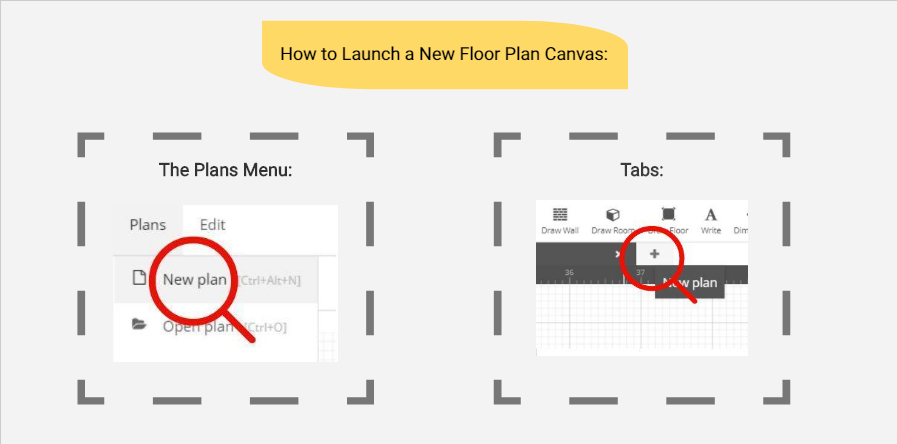
Each new plan created opens in a new tab. The tabs are displayed on the upper side of the work area, pointing out your current opened plans.
Step 1: Draw Walls
Create a floor plan wall by wall
Click the Draw Wall tool to activate it, then click in the work area to start drawing:
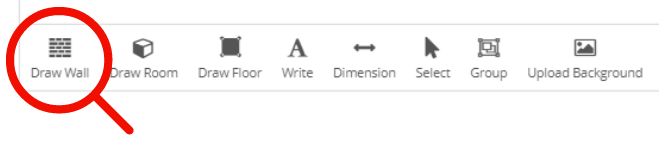
The wall follows your cursor indicating its orientation. A text box gives you dynamic feedback of the length. Double click to end wall creation. To change the thickness of the wall select it first, then choose the Edit icon in the properties bar that is visible at the bottom of the canvas once a wall is selected.
Start with a room
You can create entire rooms using the Draw Room tool, located right next to Draw Wall. Click once to activate it, then your mouse pointer will be ready to drop a room in your work space. Once the room is dropped, you can delete walls or drag any corner to any distance or angle.
Tip: Use the Select tool to select, move or delete walls.
Tip: All about walls: Working with Walls
Step 2: Doors and Windows
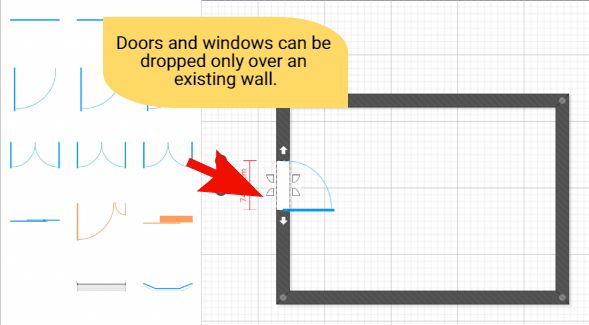
Once the walls are set to place it’s time to add doors and windows. Select + drag an item from the Doors & Windows tab on the desired wall point then drop it by releasing the mouse button. Please note that doors and windows can only be place over an existing wall.
Step 3: Floor Creation
The Draw Floor tool in the toolbar allows you to create floor surfaces. Click once on it to activate it, then your mouse pointer will be ready to define your floored area. Floors are defined by three or more points, which can be moved or deleted at any time. After you select the first point, a banding line follows your cursor indicating the floor orientation. Double click to end floor creation. Once the floor is drawn, you can drag any point to any distance or angle.
To change the texture or color of a floor select it first then click the paintbrush icon:
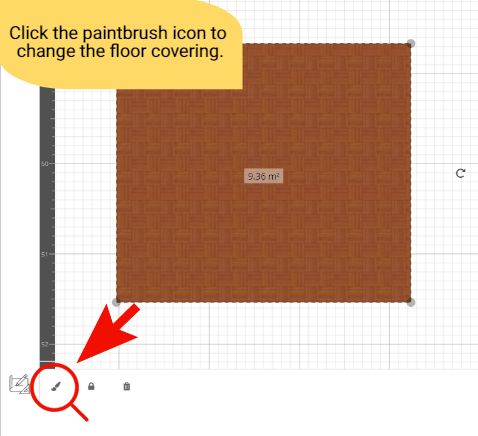
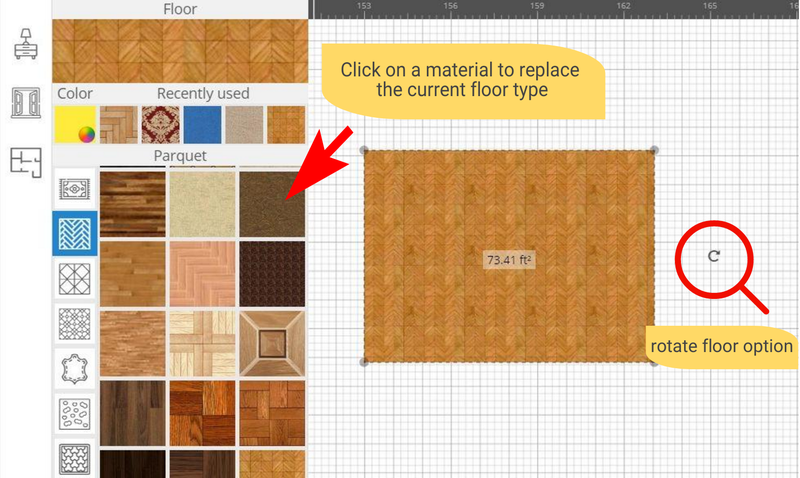
This will open a sidebar window listing the available categories where from you can click to replace the existing floor covering:
Step 4: Adding Furniture and Decor
On the Products tab you can browse icon sets and drag them onto your plans. To preview the products selection navigate through the categories.
To start furnishing click and drag icons to the work area. Once placed, an icon can be easily moved, rotated or deleted.
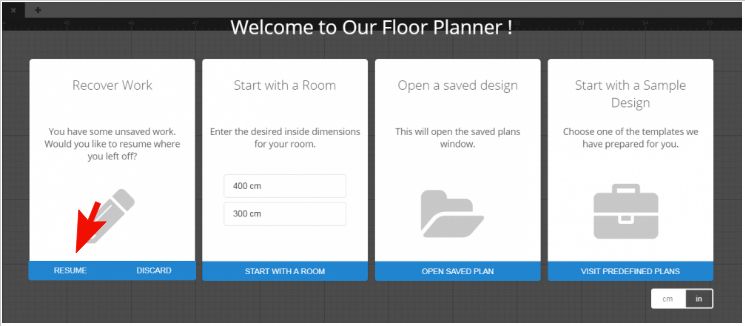
Saving a plan is only possible if you have registered and logged in. PlanningWiz is an internet based application but you should not worry that you will lose unsaved work if you lose your internet connection or something. There is an AutoSave feature that backs up unsaved work all the time. If the planner is closed without saving or encounters an unexpected shutdown, next time when the application is opened, in the welcome screen you have the option to recover any unsaved work:
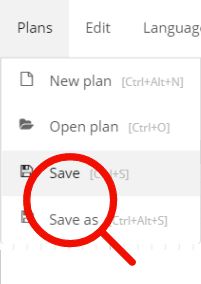
You can invoke the Save command from the ‘Plans’ menu: