Browse articles or ask us a question. We'll get you on the right path.
How to Add Doors & Windows
How to Work with Doors and Windows
Once the walls are set to place it’s time to add doors and windows. Please note that doors and windows can only be place over an existing wall (as in the real life :)), so make sure you have created a wall first.
Click on the Doors & Windows menu in the right side of the screen:
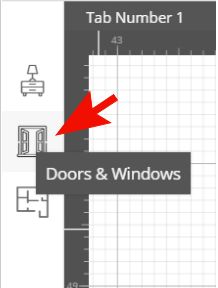
This tab presents the choice of doors and windows you need when creating a plan. Here you will find:
– basic windows
– a bay window
– simple glass and wood doors
– sliding glass and wood door
– double glass and wood doors
– a garage door
– an archway
– a wall opening
To add an object to the wall drag it on the desired wall point and drop it by releasing the mouse button.
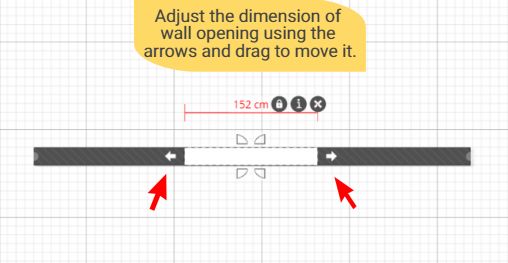
Wall Opening
To create an opening in a wall, click and drag on the wall the “Wall opening”. You can adjust the placement and dimension of wall opening using the arrows:
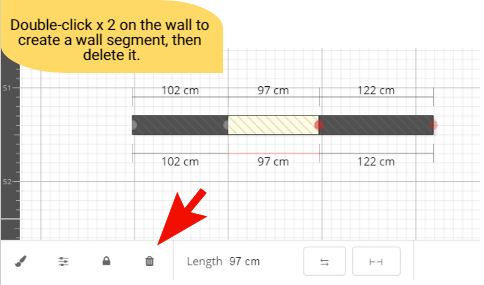
Tip: Another way to create wall openings is by removing parts from a wall. Double click to create a node in a wall (x2), and delete the resulting segment:
Customize the Dimensions and Angle
Once an object is placed on a wall you will be able to adjust its dimensions and angle. To modify a door or window you need to select it first by clicking on it.
You can adjust the dimension using the outer arrows diplayed after selecting it. You can also drag an object to move it and click the “X” to delete it.
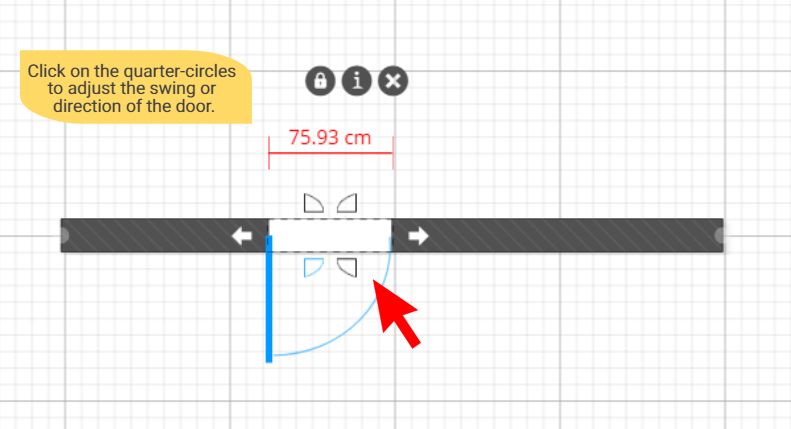
Click on the quarter-circles to adjust the swing or direction of a door or window:
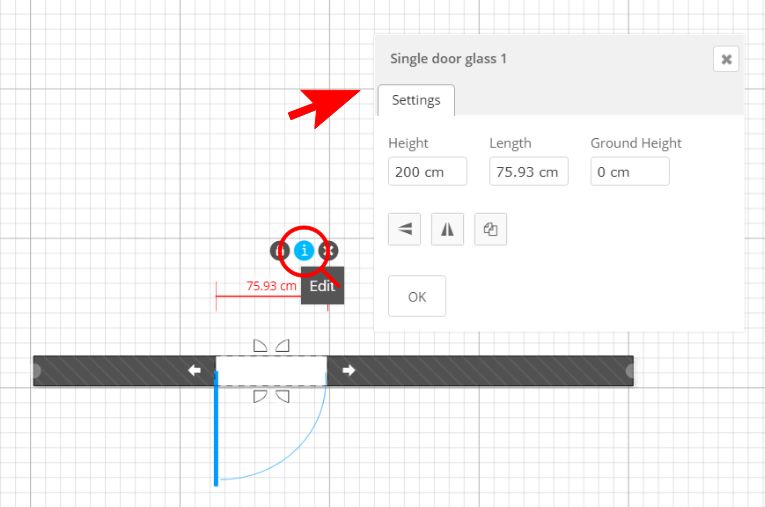
More edit options are available under the Edit menu that is available once an object is selected:
Tip: Ctrl + C on a door to copy it, and then Ctrl + V on a wall to paste it into the wall.


