Browse articles or ask us a question. We'll get you on the right path.
How to Upload a Background Floor Plan
How to Import a Floor Plan
– PRO subscription feature –
If you have a representative top-view floor plan in JPG, PNG or PDF format, the PRO subscription unlocks the Upload background feature, where from you can upload a floor plan into your planner. Uploading a floor plan as background and tracing the walls over it speeds up the wall drawing process.
How To Use Upload Background
Click the Upload Background button:

Select your source file in JPG, PNG or PDF format. The file loads in the work area.
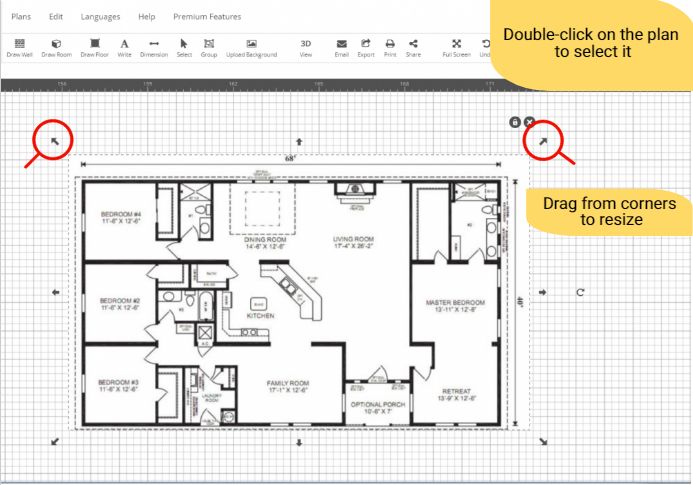
Now you can delete, scale and rotate the image to the right size using the outer arrows, displayed after selecting it (double-click to select a background-image):

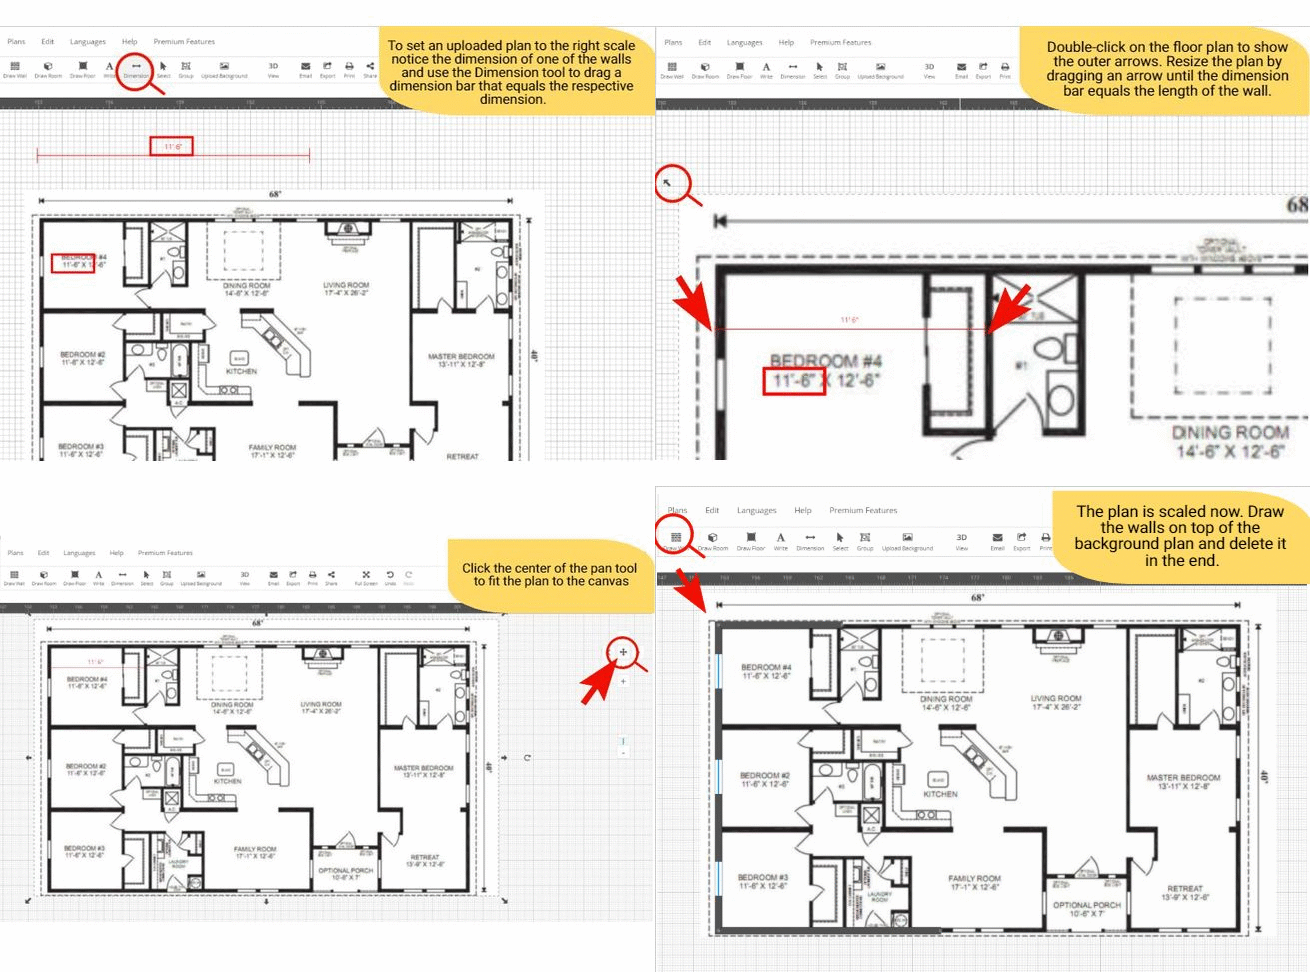
How to make sure that the floor plan is scaled correctly?
1. Notice the length of one of the walls from the floor plan you have imported.
2. With the help of the Dimension tool draw a line that equals the length of the respective wall.
3. Double click on the background plan to select it and scale it from the outer arrows until the respective wall equals the length of the dimension line:

Tip: Toggle the blueprint on or off by clicking on the Hide/Lock settings under the Edit menu.
Watch a 76 seconds video on how it works.
Click on Draw wall to activate the wall drawing mode and use the blueprint as a guide to draw walls. You can adjust the thickness of the wall from the Edit infobox that is available once a wall is selected.
Tip: While you draw, you can use the following handy buttons and hotkeys:
ctrl + 1 – Draw wall
ctrl + 2 – Draw room
ctrl + 3 – Draw floor
ctrl + 4 – Write text
ctrl + 5 – Upload background
ctrl + 6 – Dimension tool
ctrl + 7 – Group objects
Complete the Design
Next open Doors & Windows tab and use the blueprint as a guide for where to add windows and doors.
Add tiles, hardwood flooring, etc. from the Floors tab.
Add add appliances and furniture to complete the floor design from the Products tab.


